Sunday, June 19, 2011
Wiper Card
For my card I used all SU products except for the printed paper (it's from a K & Comany stack) The cardstock colors are Baja Breeze and Ceratinly Celery.
Happy Stamping,
Vickie
Friday, June 17, 2011
What can I do with all these scraps?
I used my SU Fun Flowers die to cut the layers for this bookmark. I layered the flower together and attached a piece of ribon (from my scrap ribbon pile) by punching through everything with my Big Bite and inserting a little green brad. To finish the project off, I punched a one inch circle from the same paper as the largest flower and covered up the prongs that were showing on the back of the bookmark.
You may not be able to see the that each flower was bent slightly between the petals (prior to assembly) to give the flower a more dimensional look. This makes a quick and easy bookmark for yourself or to give as a gift and it is a great way to use up scraps :-)
Happy Scraping,
Vickie
P.S. Click on each picture to enlarge. You can see the texture and details better
Thursday, June 16, 2011
Embossed Card
Happy Stampin,
Vickie
Monday, June 13, 2011
Someone really cares ...
Funny Stamp for Back of Card
Happy Stamping,
Vickie
Sunday, June 12, 2011
Top Note Gift Card Holder
Today I made a card for my son who is away at college. No real reason for the card. I was just thinking he might enjoy a little surprise, but making a card for a guy is always a challenge. Since he is a avid cycalist, I used some old fashioned bicycle paper from my stash to make a gift card holder. The layer that holds the card was cut using the Top Note die and my Big Shot (both available from Stampin Up)
Happy Stamping,
Vickie
Friday, June 10, 2011
Gatefold 6x6 Mini Album
I just love my new Cinch! Today I made this mini album using a few pieces of chipboard, some cardstock and my Cinch. The closure was made using scarps of paper and my I-top.
Happy Scrapping,
Vickie
Tuesday, April 26, 2011
Wednesday, April 6, 2011
Birdie Card
I was inspired to make this card when I saw the cute little birds on a piece of
paper I purchased. (http://www.3bugsinarug.com/ April Showers collection) I wanted to make a litte birdie for my card that closely resembled the ones in my paper. I used my ornament punch (Stampin Up), a 1 1/4 inch circle, some 7mm wiggle eyes, and a few strips of cardstock. I added my birdie to a card base that has a bit of an unusual fold and embellished with some pretty ribbon. Very simple!
Happy Stampin,
Vickie
Purse Invitation
This super easy purse invitation was one of the make and take projects that we gave to each person who registered for Scrap-fest. This one is my sample (we acutally used a different paper) so I was experimenting with ribbon and embellishment choices. I used my I-top to create the matching brad on flower. (not exactly centered but then life's not perfect!)
Happy Stamping,
Vickie
Raspberry Lemonade Card
Sorry I haven't posted much lately. I have been busy with Scrap-Fest (A one day scrapbooking event with lots of classes and shopping that is a fundraiser for Erickson All Sports Facility) In the next few posts I will show some of the projects I taught.
This card was made with vellum cardstock. I colored the inside of the vellum glass with rose red and yellow ink to make the lemondade part. Chunky glitter on the rim is supposed to look like sugar. I added a lemon and a hot pink straw (not pictured) to complete the card. I think it's pretty cute!
Happy Scrapping,
Vickie
Saturday, March 12, 2011
Paper Roses
I know I haven't posted in a while but I saw this really cool technique for making paper roses. Can you believe that these were made using the Stampin Up Owl Punch? I think they truned out awesome so I decided to put them on the Pink Stampers blog hop. I can think of lots of ways to use them in my crafting. Guess I will just have to keep practicing. Spring is almost here (yeah!)
Happy Scrapping,
Vickie
Friday, February 4, 2011
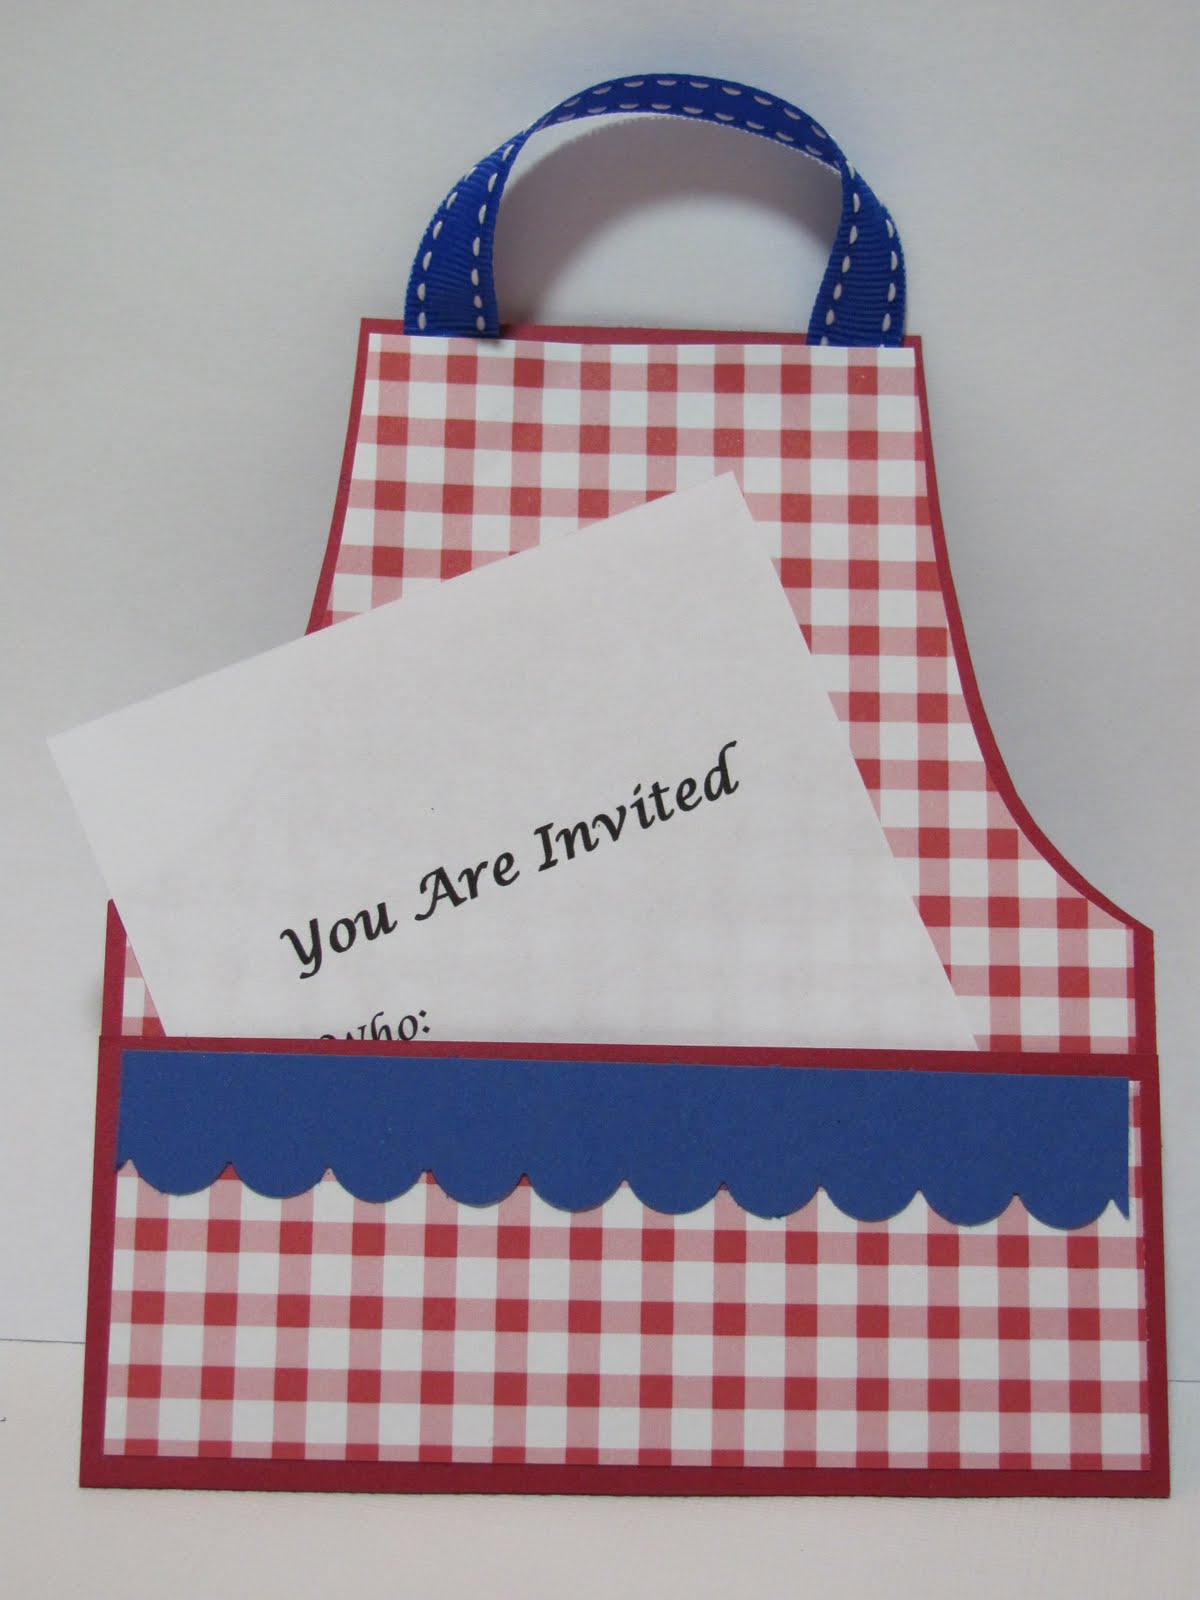
Apron Invitation
This is a quick and easy apron invitation that I worked up for my BFF Michelle. She is helping plan a summertime family reunion and needed a cute but inexpensive invitation. It is just a sample so it isn't perfect. (the scallop trim is a little too short) I will also make the entire apron a smidge (that's about half an inch) longer next time. It fits in an A2 envelope.
This one is for you Michelle :-)
Happy Stamping,
Vickie
Wednesday, February 2, 2011
Love Birds Valentine
I am working on my Valentine's Day cards. I just can't find the paper - ribbon combination I am looking for. Wish there was a better selection of craft supplies in the town where I live. :-( This card uses the SU Owl Punch, The SU Bird Punch, and a 2 1/2 inch circle punch. Gotta go tea die some ribbon (that's what I am going to try next!)
Happy Scrapping,
Vickie
Sunday, January 30, 2011
Super Simple Butterfly Cards
Saturday, January 29, 2011
Ticket for One Kiss
Just a quick little Valentine's Day card to share this evening. I used my heart shaped sizzlet from SU and some red cardstock to create the shape for the woman's top - just snip out a piece to make the neckline. I layered pink heart (cut with the SU full heart punch) behind the red piece and used a pink 1/2 inch circle cut in half to create a bust line. (I sponged the egdes to give the bust a little more definition)
For the tuxedo I punched a piece of black cardstock using the SU full heart punch. I cut a slit halfway down the center and folded each side back to create lapels. I just cut little notches in the lapel to make it look more realistic. I put a white heart behind the black to look like a shirt and used a piece of red 1/8 inch wide satin ribbon to make the tie.
To make the Ticket I used a Studio G $1 stamps that I picked up at Joann Fabrics. After I stamped the image, I used a SU ticket corner punch on each corner.
Happy crafting,
Vickie
Thursday, January 27, 2011
Be My Valentine
This Valentine card was made using the rock and roll technique. The heart stamp was inked with real red ink then the edges were rolled in chocolate chip ink. I like the effect. The hardware is from a pack that I picked up in a dollar bin somewhere. (sorry I don't know when or where)
Happy Stamping,
Vickie
Eat Chocolate Card
I was so excited to get my new SU Eat Chocolate stamp set and my Tuilip Embossing Folder. I made this card with those items. I also used the bon bons from the Cricut cartridge Yummy. I even rescued that background paper from my scrap pile. (sorry I don't know what it is called) Quick and easy to assemble - gotta love that!
Happy Scrapping,
Vickie
Another Easel Card
This morning I decided to make another easel card since I need to get a birthday card in the mail ASAP. I used my SU butterfly sizzlet and leaves sizzlet. I didn't have a prima flower in the right color so I made this flower using my SU 5 petal punch. I punched 3 flowers from ivory colored cardstock and crumpled them several times until the paper fibers started to break down. When the paper seperated into layers, I carefully pulled the layers apart. I stacked them up (alternating the points) and secured them with a brad. I sprayed the whole card with some SU champagne shimmer mist to give the card a little sparkle.
Happy Stamping,
Vickie
Wednesday, January 26, 2011
Easter Bunny Easel Card
This easel card was made using the bunny image from my new 3 Birds on Parade Cricut Cartridge. I also used the large scalloped circle die and a plain circle die with my Sizzix to create the card base and first layer (this could easily be done with the Cricut if you have a Gypsy) The best thing about this easel card is that it folds flat for mailing and I don't think you would have to add any additional postage :-)
Happy Stamping,
Vickie
Monday, January 24, 2011
My Pink Stamper Birthday Challenge
Sunday, January 23, 2011
Valentine Gift Holder with a Sweet Treat Compartment
I made this Valentine gift holder with a little hidden sweet treat compartment. Each of the six pockets measures 4 x 5 1/4 inches so I can tuck pictures, notes, or gift cards inside (I'll just crop my 4 x 6 inch photos to fit.) The heart shaped compartment on the front is perfect for holding a bit of candy. The entire project is 4 1/4 inches wide x 5 1/2 inches tall x 3/4 inches deep. I made it from two pieces of 8 1/2 x 11 white cardstock, one piece of 8 1/2 x 11 hot pink cardstock and one piece of 12 x 12 printed cardstock. Other than punches the only embellishments I used were the little plastic treat cup (from Stampin Up), a scrap of ribbon and one white mini brad. I think it is cute and economical.
Happy Scrapping,
Vickie
Vickie
Saturday, January 22, 2011
Ducky Recipe
Here is the recipe for the Ducky that I posted earlier:
Body -- 1 3/4 inch circle punch ( yellow )
Head -- 1 1/4 inch circle punch ( yellow )
Eye -- 1/2 inch circle punch ( white )
Eye -- regular hole punch ( black )
Wing -- Stampin Up Bird Punch ( yellow )
Beak -- Tip of wing - SU Bird Punch ( orange )
Sentiment Stamp -- Teeny Tiny Wishes Stamp Set from Stampin Up
Large Oval punch (SU)
Scalloped Oval punch (SU)
Note: I sponged all of the edges on my yellow pieces to give them a little more definition.
To make the ducks body, I punched the 1 3/4 inch circle then I used the same punch to take a bite out of the cut circle. I didn't measure anything. I just fiddled with it until it looked good to me.
Have fun crafting :-)
Vickie
Chocolate Bunny Card
The chocolate bunny for this card was cut using my Cricut Imagine. I added a half pearl for the cotton tail and a rhinestone for the eye. The sentiment stamp is one of those $1 Studio G stamps (series 63) I originally planned to make a matchbook fold card but added a border and belly band closure instead.
Happy Stamping,
Vickie
Ducky Card
Tuesday, January 18, 2011
Hats Off - Congratulations Card
My son's girlfriend just got accepted in physical therapy school at the university of her choice. I am so happy for her! (Congratulations Danielle :-) I wanted to make a card for her that I could tuck a little gift inside. Here's what I made.
The card base was cut at 12 x 5.5 inches and scored at 4 and 8 inches. I just trimed the outside edge of the section farthest to the right at a diagonal and folded that section inward at the score line to create a pocket for my note and gift. I decided to add a little scalloped trim along inside edge, which was applied before I secured the flap in place with sticky strip.
Happy Stamping,
Vickie
Saturday, January 15, 2011
My Pink Stamper Blog Hop Challenge
My Pink Stamper Stamper is having her first ever blog hop. You can check it out at http://www.mypinkstamper.com/ I decided to enter a card in her challenge. My card is a trifold so it was a little difficult to photograph exactly how it opens.
Happy Stamping,
Vickie
Subscribe to:
Posts (Atom)