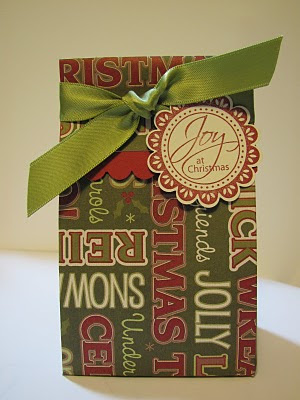

This fast and easy treat bag is economical to make and after you complete just one, you will think of dozen of thing you could use it for. The cutting and scoring sound complicated, but it isn't. Best of all, this project is an excellent way to use up those extra pages in your paper pads and stacks (the ones you didn't really like!) It is amazing what a little ribbon and trim will do to those papers you thought you'd never use.
Happy Stamping,
Vickie
- Cut paper 8 1/2 x 10 1/2 inches
- Score 10 1/2 inch side at 2, 5, 7 and 10 inches
- Score 8 1/2 inch side at 2 and 7 inches
- Orient paper so 1/2 inch wide scored sections are on the left and the 2 inch wide scored sections are on top
- Cut off the top and bottom 1/2 inch wide scored sections, leaving only one 5 x 1/2 inch scored section in place
- Cut off the 2 inch wide section on the right and two 2 inch wide sections on the left, leaving one 2 inch wide section on top. This will be the top of the bag.
- Cut each vertical score line at the bottom of the bag - up to the first horizontal score line at 7 inches.
- Fold all score lines.
- Lay bag face down and fold back the 1/2 inch wide section- apply adhesive (it will be on the front side of the paper)
- Without folding, apply adhesive to the bottom flap closest to the 1/2 inch wide section (the adhesive will be on the back side of the paper)
- Fold up the box
- Pinch in the sides and fold top flap over opening
- decorate as desired (I added a piece of scalloped trim, a simple tag, and some ribbon)


No comments:
Post a Comment